Saturday 8 December 2012

Stöllen


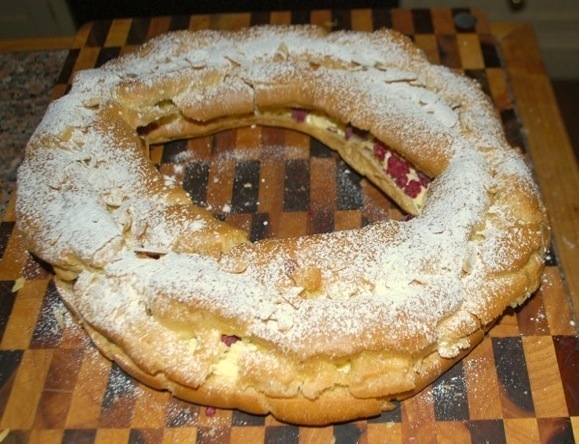
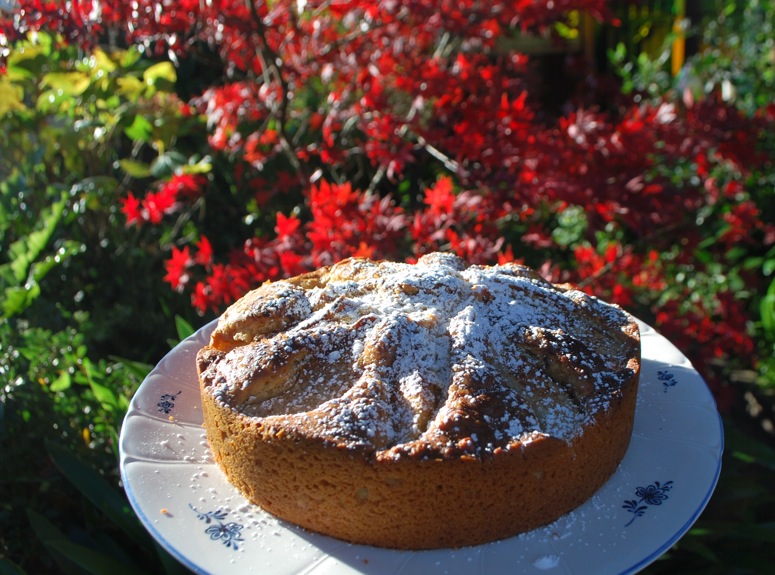
I love Stöllen.  I think it is extra special because we only eat it at Christmas time.  I guess if we had it all the time, the magic could be lost.  It was towards the end of November, a month before Christmas I decided that the time to bake Stöllen has arrived.  I baked it twice for home and once for my daughter's school so far.
I was chuffed to be asked for the recipe by a couple of mothers who got to taste it.

I used to bake Stöllen with marzipan in the middle, but I realised last year that I didn't really enjoy eating the intensely sweet bit in the middle.  So this year, I mixed plenty of almond flakes in the dough instead of marzipan.  I much prefer it, but if you like your marzipan, there is nothing stopping you from putting some in there before the second proofing.


180ml Milk
7g Dry Yeast
410g Plain Flour170g Softened Butter
80g Brown Sugar
1 1/2 Eggs
3g Salt (if using unsalted butter, add 8g of salt)
1 tbs Mixed Spice
1 tsp Ginger Powder
1 tsp Cinnamon
125g Mixed Dry Fruit 
125g Flaked Almonds


Mix all the ingredients together until well combined.
You don't have to knead it much.
Don't be alarmed, it is meant to be a sticky and messy dough.  
Leave it to proof for 90 minutes.

You can either make one big Stollen or two small ones.
The bigger one takes longer to bake.
If making two small ones, divide the dough into two equal portions.
Use plenty of flour on the bench and roll each one out into a thick disk.
Fold over and let the dough proof for 60 minutes.

Bake in the preheated oven (180 degrees celsius) for approximately 30 minutes (35 minutes if baking one big stollen).
Every oven is different, so you need to see if the stollen looks nice and golden all over before you take it out of the oven.

When they are still hot, brush with a generous amount of melted butter (not included in the recipe above) all over and dust icing sugar on top.

Saturday 10 November 2012

Paris-Brest with raspberries


We had friends over for dinner last night and this picture above is actually the dud version of the Paris-Brest I baked yesterday.  I have a tried and tested (dozens of times) recipe for choux pastry.  For some reason, I decided to try this other recipe I found in a book given to me by a friend yesterday.  The ratio of flour to  egg seemed a little odd to me, but I persisted.  The result was that the choux pastry puffed up briefly, but then collapsed once the oven temperature was lowered and never recovered.

I baked a second one using my usual recipe and fortunately that one worked much better.

I really need to learn that I need to stick with the trustworthy recipe when I'm entertaining!


Anyway, the inspiration for this dessert comes from this amazing dish I ate at Bistro Moncur almost 10 years ago.  It was actually an eclair which was crispy, with beautiful custard, buttery almond slices with the best raspberries I ever tasted in my life.

With a scary amount of egg yolks that went into the custard and the two batches of choux pastry I made, I lost count of the eggs I used yesterday.  Best not to think too much about it really.

The one I served last night looked better and had golden almond slices scattered in between and on top, but the flashlight really didn't do it justice.


Even though I used the raspberries, it still tasted pretty good.
My only regret is that it took me almost 10 years to recreate it.
It won't take that long for my next one : )

Thursday 11 October 2012

Macadamia & White Chocolate Cookies


I have a weakness for these cookies.
The crunchy oily macadamia nuts and the guilty pleasures of the white chocolate mixed with buttery cookie sweetened with brown sugar.  How could you resist them?

For these cookies, I find the chocolate buttons are too small.
The white chocolate bits need to be chunky enough to sink your teeth into.
So, I recommend buying a block of chocolate and roughly crack it into chunky, yet manageable bits.

100g butter (personally I like using salted butter)
100g brown sugar
1 egg
200g self raising flour
30g coconuts

Macadamia nuts (roasted for 7 minutes)
White chocolate chunks


Oven 170 degrees celsius
Bake for approximately 10 minutes or till golden


Sunday 30 September 2012

The real sausage rolls


I baked these sausage bread rolls for lunch last week.
I was planning to bake bread rolls, cook sausages and salad originally.
Then I thought, why not bake them together?
I would do anything to reduce the amount of washing up : )

The sausages were Germanic smoked type, so they just needed to be reheated while the bread dough around them were being baked.
I don't think you can do this with raw sausages.

My German mother in law liked them very much.

The trick is to roll out the dough in a long triangle shape, then place the sausage on the wide end of the triangle and roll up towards the pointy end.

These were baked in the 180 degrees celsius oven for approximately 20 minutes.


Saturday 22 September 2012

Strawberry and Ganache Tart


My husband was watching Jamie Oliver on TV one night and said to me the next day.

"When are you making that thing with the orange?"

He is not exactly articulate, my hubby.  However, he has trained me to guess what he wants to say and after a quick scan of my brains, I worked out he was talking about the ganache dessert Jamie made with mandarins and biscuits.

If all he wants is just the gooey ganache, I decided that I could make something even better by baking a tart case and pouring the ganache in it to set.

Over the years, I have tried numerous chocolate tart recipes.
I have come to a conclusion that the ganache tart is by far the best and also quicker to make.

Yum. Got to love the srawberry season.

Sunday 16 September 2012

Bithdaycakes


It was my daughter's birthday the other day and I have baked cakes for three separate celebrations.

The one above was the one we took to school.  Of all the chocolate cake recipes I have baked in my life, I would have to say the stout chocolate cake one is the best.  Recently I have revised the recipe which uses treacle dissolved in hot water instead of stout which works just as well if not better.

This is a beautiful moist cake and all it needs is some whipped cream with a little bit of acidity from berries.


The second one I made was for the home celebration.
I made a disc of raspberry mousse which was sandwitched by sponge layers.  
Please don't ask why I'm not showing a close up photo of it.....


This is the joint birthday cake I made on the weekend for my daughter and her friend who has her birthday in two weeks.

I wish I had just a few more strawberries to complete the line of chocolate dipped berries.
Because the chocolate was stuck on the plate, I could not even rearrange them : (


In a couple of days, I will be baking another birthday cake.
This time it will be for my father in law.


Tuesday 4 September 2012

Potato, Rosemary and Cheese Bread


On the weekend, I had some families over for an afternoon tea.
Usually, I would bake a couple of cakes as well as biscuits for an occasion like that, but I knew that all the kids were going to attend a birthday party in the late afternoon and that they were most certain to overdose on sugar in those two hours.
That is why I baked only one cake and a couple of snacking bread.

For this one, I cubed and boiled some potatoes till just tender.  Once the potatoes were drained, I drizzled some extra virgin olive oil, garlic, rosemary, and a little salt over the potatoes, mixed them well and set aside.

I rolled out the bread dough, placed the cubed potato in a line at one end, sprinkled grated cheese all over, then rolled the dough from the potato end.  I then placed this roll on a baking tray lined with silicon baking sheet, shaped it into a horseshoe, snipped along it with a pair of kitchen scissors to create vents, and let it proof for 45 minutes or so before baking it in the 180 degrees celsius oven till golden brown. Approximately 30 minutes, but it depends on your oven.  Make sure the cheese is molten and bubbling.


Wednesday 29 August 2012

Upside down pizza


There are upside down apple pies, upside down pineapple cakes, etc etc.
So, why not an upside down pizza?


I was actually stuck for dinner ideas on the weekend.  I didn't have much in the fridge and somehow I had to make a Sunday evening dinner.  It would have been sad to just present pumpkin soup on the table.  I was going to just bake some butter rolls to go with the soup, then I had an idea.


I fried some onions, paprica, and olives with olive oil.  I sprinkled some shredded cheese and covered the pan with the bread dough.  I baked it in the oven till the top of the  bread was golden and tipped the whole thing over a plate.  Voila!


Saturday 18 August 2012

Seviile Orange Marmalade


Up until now, I have managed to only post "baked" creations in this blog in accordance with the name I gave this thing.  But how could I resist this beautiful sunshine in a jar?


It was when we first moved to the Blue Mountains 5 years ago, I went to the local market and met the "Jam Lady" who appeared at many of the markets around the mountains selling her jars of jams and marmalades.  She had several marmalades and I asked her which one I should try.  She said of all the marmalades she makes, her favourite was the Seville Orange one.

Who am I to argue with the Jam Lady?  I bought a jar off her and I never looked back.

What I did was to look up Stephanie Alexander's recipe for Seville Orange Marmalade and cooked dozens of Seville oranges for the next few years.

Seville Oranges in Australia are available in the month of August.  Not all green grocers have them, so you may need to ask your local one to procure some for you.

Last year, however, a fellow jam maker (otherwise known as a friendly witch) in the mountains told me to cooke the whole fruit in water for a couple of hours before chopping them into small strips.

This makes chopping much easier and I will never make marmalade any other way.

I like the jelly in my marmalade, so I always put plenty of liquid in my marmalade.  Sometimes this requires more time, sugar and pectin, but the results are worth the trouble.

This year, I cooked 10 Seville Oranges and made about 24 jars of a standard Bonne Maman size.  I have already given some away.  Some of my friends and family are waiting for their supply for the year.  I should have just enough left for our consumption until August next year.

Saturday 11 August 2012

trying to be croquembouche


For my birthday a few days ago, to cheer myself up, I attempted to make a croquembouche for the first time.  I have made profiteroles dozens of times, so I knew I could do that part easily enough.  If it was just the matter of constructing a tower with the profiteroles, how hard could it be?


It was just going to be just for me, my hubby and our little girl, so I knew that it would be unwise to make a huge one.  Not because we wouldn't be able to eat  the whole thing, but because we probably would eat the whole thing.  

I baked 28 smallish choux buns.  Actually I baked more, but some disappeared.
I used a frozen puff pastry for the base.  
I filled profiteroles with custard and used caramel as glue to build a tower.
A circle of seven at the base, then six, then five, etc etc.

The final touch was to spin caramel around it.

I had a lot of fun pulling and stretching caramel.  That really was the best bit, except for eating the individual profiteroles.   

I had this notion that I dislike profiteroles with too much caramel around them.
I seem to recall hurting my mouth with shards of caramel and that is why I only used caramel as glue to hold the tower together.  And of course as decorative spun sugar around the tower.

Now I think that as long as I'm making croquembouche for enough people to be eaten in one sitting, ie.,  may be 3 profiteroles each, more caramel might be desirable.

I certainly had fun making it and enjoyed eating it even more.  Thank goodness I didn't make a huge one.  My jeans would have 'shrunk'.

Tuesday 31 July 2012

Walnut and Dates Crusty Loaf


This rustic crusty bread is what I bake for myself once a week.
It is a beautiful bread with 25% wholemeal flour.  I throw in a handful of walnuts and a few dates before I roll up the dough for the final proofing.

The funny thing is, this bread stays moist and bouncy inside even when it is a few days old.  I think the secret is in the overnight proofing.  I knead the dough at night and leave it over night.  In the morning, I punch it down and let it proof for the second time.  Because it is so cold even in the kitchen at the moment, it takes a good two hours before the dough is ready for the oven.

Flour (strong 75% & wholemeal plain 25%) 500g
Salt 10g
Brown sugar 1 teaspoon
water 390ml
dry yeast 1 teaspoon


This bread is lovely on its own, with butter, and with cheese.

Saturday 21 July 2012

Potato Chocolate Cake


I found a new baking book and I'm in love with it.
I find that most cake books have similar recipes and I'm lucky if I can find one or two things I want to bake out of each book.
This one, however, is different.
I found so many recipes that I'm intrigued by, I have post it notes sticking out of all over the book.
Now I'm beginning to think that I would actually have to purchase this book as I can not bear the thought of returning it to the library.


The books is, Belinda Jeffery's Mix and Bake.
So many of her recipes are different to the standard cakes and slices.


This chocolate cake I baked today was inspired from this book.
 I am incapable of following a recipe, I did change it here and there.  For example, I used brown sugar rather than castor sugar.  I used more cocoa because I love really chocolaty chocolate cake.  I blitzed chocolate in the food processor instead of grating it.  The smallest potato I found in my pantry was heavier than specified in the recipe, but I wasn't going to waste 30g of potato.  

The result is a luscious chocolate cake.  
My daughter who said that she was not prepared to eat a cake that has a potato in it quickly changed her mind when I presented it to her and her friend who is spending a day with us today.  
Yes, we are blessed with a perpetual shrieking happy bubbly chatter in the background ALL DAY.  


Wednesday 11 July 2012

easiest coffee cake


One day last week, I was expecting some people to come over and I wanted to bake a cake for them.  Usually, I have no trouble at all motivating myself to bake.  However, on this day, I was being extremely indecisive.  I kept putting it off all day till it came to the point that I had to start baking something immediately or it was going to be too late.

So I ended up baking this cake which is probably the easiest cake to make out of my collection.

It does not involve separating eggs or whipping.  You don't even have to melt butter, because you don't need butter for this recipe.  You just mix and pop it into the oven.  That's it.


Mix two eggs with 180ml of vegetable oil (I used light olive oil), 80ml of sour cream and 200ml of brown sugar.
Then add a shot of strong espresso or two teaspoons of instant coffee dissolved in 80ml of hot water.
Mix in 220g of self raising flour, pour it into a prepared cake tin (20cm) and baked in the medium hot oven for approximately 30 minutes.


It just needs some whipped cream and a drizzle of coffee essence to serve.


Friday 29 June 2012

Less guilt, more joy croissants


I love croissants.  Who doesn't?
But if you knew precisely how much better goes into it (if you are buying an authentic one that is), and  unless you are trying to fatten yourself up before you embark on a stint in Antarctica, you couldn't really enjoy it.
That is why I don't buy croissants anymore.  What I do is to make my version at home whenever I feel the urge.

The base dough is a plain one with just flour, yeast, water, a little sugar and salt.
I roll out the dough as thinly as possible, I line the middle part with sliced cold butter, fold the dough till all the butter is hidden and seal well.  Roll out the dough, fold, roll out the dough fold, repeat this a few times.  Then cut the dough into triangles.  Roll from the wide end towards the pointy end.

Let it proof for 40~60 minutes depending on the temperature.

Bake till golden brown.


I don't weigh the butter when I make them.  I just put as much as I feel my family can safely consume without causing them to have a cardiac arrest.  Generally , I probably use about one third of the butter in the standard recipe.  


It still tastes pretty good.

Friday 22 June 2012

Easy Tart Tatin


Usually, I am guilty of using bought frozen pie sheets for tart tatin, but for some reason I felt virtuous a few days ago and decided to make quasi real pie dough.


I just blitzed 125g of cold butter (reduced salt) with 125g of plain flour and added 60ml of cold water.  That's all, but I have got to say that the flavour of the real butter made this pastry such a joy to eat.

From now on, I think I will almost always make my own pastry.

Friday 1 June 2012

Pear and Yogurt cake


It has been a stressful week and when I'm stressed, I bake even more than usual as I find it therapeutic.  The act of measuring, mixing, baking, transforming something into a delicious treat for friends and family.  The extra warmth the oven releases into the kitchen is also welcome.

This cake doesn't have alarming amount of butter or sugar.
It's a light and moist everyday kind of cake.


Butter 120g
Brown sugar 100g
Eggs 2
Yogurt 200ml
Self Raising Flour 210g
Cinnamon and or cardamon powder 2 tsp

Pear
Raw sugar 2 tbs
Icing sugar

Preheat oven to 180 degrees celsius.

Beat butter and brown sugar till fluffy and beat in the eggs and yogurt.
Add flour and spice last and mix till well combined.

Bake in a lined 20cm cake tin with sliced pear on top with a sprinkle of raw sugar to finish.
It depends on the oven, but it takes 30~45 minutes.

Powder some icing sugar on top when cool.


Tuesday 22 May 2012


I was expecting a friend to arrive mid-morning the other day.

I began to bake a cheesecake for our morning tea, but after it went in the oven I realised that it was never going to be ready in time, because it was one of those cheesecakes that tastes better when chilled.  So, I baked granola as it is nice and quick to make.

Basically you need roughly the equal portions of melted butter, honey and condensed milk.  Warm them up together in a bowl in the microwave to make the honey and condensed milk runny, but not boiling hot.

Put some rolled oats, shredded coconut, walnuts, and dried cranberries into the bowl until the mixture sticks together but not too wet.  If it's too wet, keep on adding more oats bit by bit.

Line a baking tray with baking paper, tip the dough onto it, use a back of a spoon to spread over until it is about a centimetre thick.  Bake in the 180 degrees celsius oven until the edges are nice and brown.

It is chewy in the middle and crisp on the edge.  You will not be able to stop eating it till it is all gone.


Sunday 13 May 2012

Cheese Crescent Bread


Last month, I was contacted by one of my readers of my Japanese blog.  

This lady lives and teaches belly dance in Japan, but her dance teacher lives in the Blue Mountains (in New South Wales, Australia) where I also live.  She was travelling from Japan to get a week of intensive lessons from her teacher and was going to be staying in the mountains for the duration.

By coincidence,  I was learning belly dance again after a break of 12 years (from another teacher).  Given the synchronicity, I had to invite her over for lunch when she was here.  

I made a zucchini soup and this cheese bread.


This also happens to be my signature bread.

The dough is quite rich with egg, butter, olive oil and milk.


I rolled out the dough, sprinkled some chopped garlic and rosemary, and plenty of grated cheddar cheese all over.  I then rolled it up and bent it like a horse shoe to proof for the second time.


Once it has risen ready to be baked, I used my kitchen scissors to snip the top of the roll all along the length.  Into the 180 degrees celsius oven for approximately 30 minutes or until you can see melted cheese bubbling out of the vents.  


This bread goes beautifully with vegetable based soup for lunch.


Anyway, back to the belly dance teacher from Japan.
She knew quite a lot about me having been my reader for over two years and she recognised the sections of my house (where I take photos of my food), my daughter and even Merlin the cat.

She kept saying that she couldn't believe that she was here and meeting me.

It was a little strange to be an object of such wonder, but also very flattering. The main thing was that she enjoyed my food.


Sunday 6 May 2012

Blueberry Yogurt Cake


Because I'm always feeling responsible for the size of my husband's waist, I often try to substitute calorific element of a cake recipe with something lighter.
Using yogurt in a cake gives you an impression that it is healthy and consequently eat too much, so the trick probably isn't all that effective.

However, this recipe was very popular amongst my Japanese blog readers.

Butter 180g
Castor Sugar 180g
Eggs 3
Yogurt 200ml
Self Raising Flour 250g
Blueberries 200g

Mix butter and sugar for several minutes with electric mixer.
Add eggs and yogurt and continue to whisk.
Mix flour in then lastly add blueberries.

I baked this cake in a square silicon mould, but it can be baked in any old cake tins.

Bake in 180 degrees celsius oven.

Depending on the oven and the size of the mould, the baking time would vary.
Basically it needs to be golden on to and as long as the middle bit does not wobble when you shake the mould, it should be done.


Sunday 29 April 2012

Flattened calzone with pesto


I had some left over pizza dough.
I also had some left over pesto I made with my home grown basil.

You can't let these things go to waste, can you?

I rolled out the pizza dough and smeared the pesto, shredded cheddar cheese directly over the pesto,
sprinkled some diced ham off the bone and sliced black olives, folded the dough in half and sealed the edges.

If you are an Italian, don't crucify me, but I then used my kitchen scissors to snip some holes on top to let the steam out and baked in a hot oven until it was golden on top with molten cheese erupting out of the steam holes.

I congratulated myself as I ate this exceptionally yummy creation : )


Friday 20 April 2012

Almost guilt free Biscotti


Sweet, crunchy, nutty, perfect with your cup of coffee (or dandelion brew in my case), and best of all, biscotti are so LOW in FAT, they are practically diet food.
Last week, as I began to beat eggs and sugar, I realised that I was out of whole almonds, so had to used sliced almonds.  Visually not as exciting as whole almonds, but in actual fact, tastes better with sliced almonds as the nuttiness is evenly spread out.


2 eggs+1 yolk
240g castor sugar
2 tbs olive oil
2 cup Self rising flour (or plain flour with 2 tsp baking powder)
100g nuts of your choice

Preheat oven to 170 degrees celsius.
Line a large(ish) baking tray with baking paper.
Beat eggs and sugar until pale.  Add oil, flour, then nuts.
Spread the dough evenly on the tray.
Bake for 12 minutes or so until the crust is dry enough to cut.

Slide the biscotti on a chopping board and slice into fingers.
I cut it in half lengthwise, then slice them into approximately 1.5cm wide fingers.

Line them back onto the baking tray and bake for another 10~15 minutes until they are dry to touch.  You can always sample one to see if it is nice and crunchy.

Store in airtight container for a week, but mine always disappears within a few days.

When I first learned to make biscotti 10 years ago, I went crazy and baked one after another so many times until my need for biscotti was completely satisfied which lasted a few years.  Now I am back to baking biscotti on a regular basis as I know my husband goes foraging in the pantry and would start eating my stash of cooking chocolate unless the cookie jar is filled with these.

Friday 13 April 2012

Loaf of white bread


This, my beloved husband claims is his favourite bread for his morning toast.
I just use ordinary plain flour and dried yeast for this recipe.  Nothing fancy.

I think it is the milk in the mixture that gives it a lovely crust when toasted.

I usually sneak in about 20% wholemeal flour.  If I add anymore, he calls it 'brown bread' and is not happy about it.

Plain Flour 1kg
Malt 50g
Dried yeast 10g
Milk 250ml
Water 430ml
Olive oil 60g
Salt 20g


You know how to knead bread, yes?

For this amount of dried yeast per flour, it takes a little longer to proof.
Usually 3 hours or so.
From then on, it works as standard bread.
I divide the dough in two to bake two loaves in separate tins.

Around 40 minutes in 180 degrees celsius.

Wait till cooled before slicing the bread.

During colder months, I tend to bake this bread every week.  I slice them, wrap them and freeze them for my daughter's sandwitches during the week.

I find for this kind of loaf, plain flour works well for soft and fluffy finish.


Saturday 7 April 2012

Walnut and Caramel Tart


I baked this tart on Friday for our friends who were staying with us.

The recipe for the filling is from Skye Gyngell's A Year in my Kitchen and the recipe for the tart base is from my friend Panipopo (Japanese blogger of amazing French style patisserie).  

There is something magical about the combination of nuts and caramel, don't you think?


We were blessed with glorious Autumn weather for a few days, 
but it is looking a little gloomy this Easter Sunday morning.  

Our six year old has been living for this day, the day of the egg hunt at Everglades in Leura.

Apart from that outing, I will take it easy as I need to shake off this cold I got.


Saturday 31 March 2012

The Best Hot Cross Buns


I have given this recipe to numerous people and they all come back to tell me how much they loved it.  So easy, it's a perfect beginner's recipe.

As the outside temperature drops, there is nothing better than having freshly baked hot cross buns straight out of the oven.  The oven warms the kitchen and the smell of sweet spice fills the air.  
I always bake several batches leading up to Easter every year. 

For 9 hot cross buns

Warm a cup of milk to about body temperature.
Stir in 50g of brown sugar as well as a table spoon of dry yeast.
Set aside while measuring other ingredients.

Plain flour (don't use strong flour) 450g
Salt 1 tsp
Mixed spice 1 heaped tsp
Melted butter 40g
Egg 1
Dried fruit (a mix containing some peels are ideal) 150g

For the cross
Plain flour 50ml
Sugar 1 tsp
Water 1.5 tbs
Vegetable oil 1/2 tsp

Sugar syrup or apple jelly for glaze


Combine all the ingredients in a large bowl.
You don't need to knead it for long.  Leave covered for one hour in a warm place.
After it has doubled in size, punch it down, cut into 9 equal portions.

Put a thumb in the middle of the dough and with the other fingers to pull the dough and tuck into the dent created by the thumb.  This will give your bun a nice smooth surface.

place them 3 by 3 with at least a centimetre in between the buns.
When they expand, they will stick to each other, but it will be easy to pull them apart.

Mix the ingredients for the cross.  You can use a small piping bag, but if you don't have one, use a small zip lock bag for snacks and make a small cut in the corner to squeeze the dough out.

Let rise for 45 minutes.  Don't forget to preheat the oven to 180~200 degrees Celsius and bake for 20 minutes or till golden brown.

While the buns are still hot, use a pastry brush to glaze the buns.
I use my mother in law's apple jelly for this.  
I think you can use apricot jam or the jelly from marmalade.
However, if you have neither of these, I don't think you need to glaze the buns at all.
If you want to, you can make some sugar syrup.